As a software development company, we always strive to make our software as secure as possible. Here are some things we do to keep you safe and ensure your privacy.
Signing
The installer available for download is signed with an EV certificate. EV stands for extended validation, a high standard for digital certificates used with hardware dongles to keep them safe.
After downloading the installer, you can right-click it and select properties. The property dialog will have a signature tab with the signature information.
Virus Scanning
Development is done on computers with updated anti-virus software. The installer is also analyzed with a long list of scanners to add an extra layer of security. Occasionally, we see that some scanners flag the software as a potential threat. False positives are common, as scanners find patterns similar to some of the viruses they are looking for.
Privacy
The software does not send any information back to us. Therefore, what you print will stay your secret. We are considering sending version information sometime in the future. This will be part of a regular update notification.
Logging and temporary files
Logging of program actions and temporary files are written when the program is running. This information is stored on your local computer. Files are cleaned up after completion unless you run it in debug mode.
Some software versions offer DOD-level deletion of the temporary files for an extra layer of security.
You can force the used color model of the PDF printer by adding a setting to the global configuration file. The setting is the ColorModel, which was introduced in version 8.2.
The value can be RGB, CMYK, or GRAY. Here is an example of a global.ini file that sets the color model to CMYK:
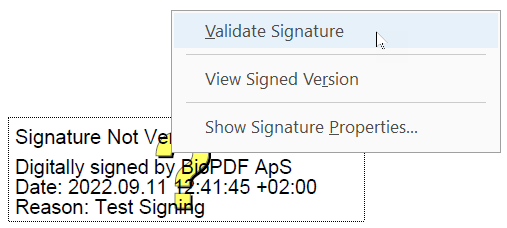
The Adobe Reader can validate the digital signature on digitally signed PDF files. It can do that automatically when a PDF document is opened in the viewer. However, it is a configuration setting that determines if it does that or if you should do it manually.
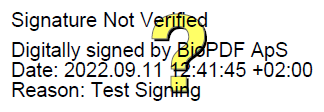
Digital signature on PDF document
The image above shows what it may look like if the signature isn’t validated. You can right-click it and select Validate Signature to make Adobe Reader perform the validation.
A user reported the error 1044 when trying to send an email via Microsoft Outlook.
This is the full error message in German:
Ein Fehler ist aufgetreten.
Error 1044: PDF Priter cannot send the email. Error: Die Datai oder Assembly "office, Version=15.0.0.0, Culture=neutral, PublicKeyToken=71e9bce111e9429c" oder eine Abhängigkeit davon wurde nicht gefunden. Zugriff verweigert.
Source: GUI
Internal hint: Email the document
The issue was resolved by running the Microsoft Office repair tool.
You can make the PDF printer attach and send the output via email. It can open your email client and create a new mail ready for editing or it can send the mail automatically via SMTP.
If you check the email option on the general tab of the configuration dialog then it will try to use your default email client to open the new email.
Advanced options are available using settings in the configuration files. You can set the email client to auto (default), outlook, smtp, mapi, mapi32, or mapi64 to help it select the correct email client for opening or sending the mail. These and other advanced settings are normally set in the global.ini configuration file.
All the email settings are listed here: https://www.biopdf.com/guide/settings.php
The settings can be set directly in configuration files or via the Microsof.NET and COM programming interfaces.
If you experience that the printer is opening the wrong email client then you can try setting another via global.ini.
We get notifications about virus detection software that raises a flag on our products from time to time.
Alerts are triggered because specific program code match patterns shared by malicious code. While some anti-virus programs look at the context of the code, others are more prone to raise an alert as soon as a pattern is matched.
Because the programs sometimes use code obfuscation to protect the intellectual property, it is hard for the detection to see the context. On top of that, some viruses are distributed using the same type of obfuscation and therefore producing some of the same code patterns.
Before we release new versions of our programs, we try to scan the release candidates with as many different brands of anti-virus software as possible. We do this to change some of the code to minimize the number of triggered alerts for false positives. However, this is a moving target because the searched patterns change over time.
If you find a detection alert, you are welcome to send us information about it. We will look at it and see if we can change the code signature to prevent it in the future. This will help us improve the software over time.
Our installers are signed with digital certificates to prevent code changes. Make sure that you have checked the signature before you install it. You should generally validate the signature on everything you get via the Internet.
We do not consider it a realistic target to have zero detections across all brands of anti-virus software at all times. If only one or two brands detect something, it may be better to contact them about the triggered event.
The built in watermark text does not support Unicode text. In this example you will see how you can easily create a Japanese watermark text and use it when printing from Notepad. Of course you can also use technique for other languages and when printing from other applications.
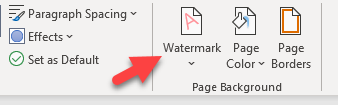
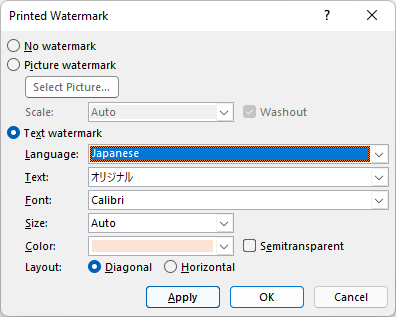
First you open a program such as Microsoft Word to produce the watermark with the Unicode text. In Word there is a watermark feature that helps you create diagonal text on your document background. We can use that in this example.
Select the watermark tool from the menu
The Printed Watermark dialog will appear and you can set the watermark properties as you please.
Setting the watermark text, font and color
With the watermark in place you have an empty page with at diagonal text. The next step is to export this Word document to a PDF. You can use the built in export functionality in Word or print it to the PDF printer.
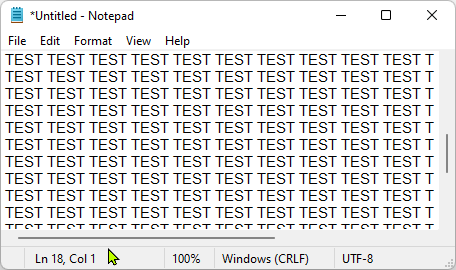
Now that we have the watermark PDF, we can start using it. In this example we have a simple Notepad document that we want to print with the watermark.
Sample document to print with a text watermark
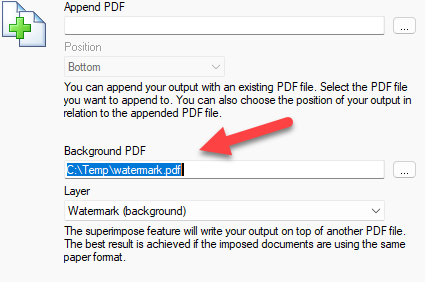
When you print this document to the PDF printer, you must click the Merge tab to specify the watermark PDF file as the background.
Setting the watermark PDF as the printed background
That’s it. You are done. The result will look like this.
The runonce.ini is a configuration file used to set the parameters for the next print job. It is typically used by programmers to specify how a PDF should be created and where it should be saved.
In structure the runonce.ini is a normal ini configuration file with a main section and simple name value pairs in a text file. It can look something like this:
A runonce configuration is only meant for one print job. When the printer sees a runonce configuration it will read it and delete it, so that it does not affect the next job.
Concurrency
Printing is an asynchronous process where a program places a print job on the print job queue. Job on the print queue is handled by the Windows Spooler process and sent to the individual printers. Therefore, a program cannot know when a specific print job is up for printing. It can send it to the queue but then it is up to the Spooler.
When printing multiple jobs without any pause between the jobs, you risk overriding a previous runonce.ini before it has been picked up by the corresponding print job. There are basically two strategies you can use to avoid this problem.
The first is to wait for your print job to finish before sending the next one. Let’s say that you are a programmer and want to print multiple PDF documents in a loop. In this case it is recommended that you use the statusfile setting to specify a unique status file name for each job. After you have written the runonce configuration and sent the job to the printer, you wait for the status file to appear. When you see the status file, you can read it and move on to the next job. The benefit of waiting for a status file instead of the actual document is that the status file will also be created in case of an error. The other benefit is that the resulting PDF document is completed when the status file is written. If you simply look for the PDF document then it may not be complete when you first see it in the file system.
The second method require that you can control the name of the print job in the printer queue. This is possible from many programming languages but it may not be possible in other systems. If you can set the print job name then you can create a specific runonce configuration that will only be picked up by that particular print job. More information is available here:
In case you need a high throughput of print jobs, you can install multiple printers with dedicated printer ports. You can read more about Printing to multiple virtual printers simultaneously here:
The runonce configurations are user specific. This means that runonce files from one user does not affect other users on a system with multiple users. This means that it is safe to use on a Terminal Server.
Creating Runonce Files
Given that the runonce is a simple text file, you can use any programming technique for writing text files to create a configuration. The location and character encoding are documented here:
Instead of writing the configuration files directly, it is recommended that you use the API to do that. The API will know the correct location for the current users on the specific version of Windows. The API is available in both COM and Microsoft.NET versions.
Examples
This is a link to an example of how to use the runonce from code: